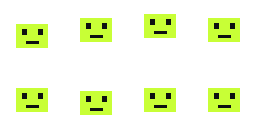
godot sprite sheet

Godot Sprite Sheet: Import and Animate

Import a Godot sprite sheet with AnimatedSprite2D. Download a free 4×2 PNG example, select the grid, set playback timing, and troubleshoot frame boundaries.

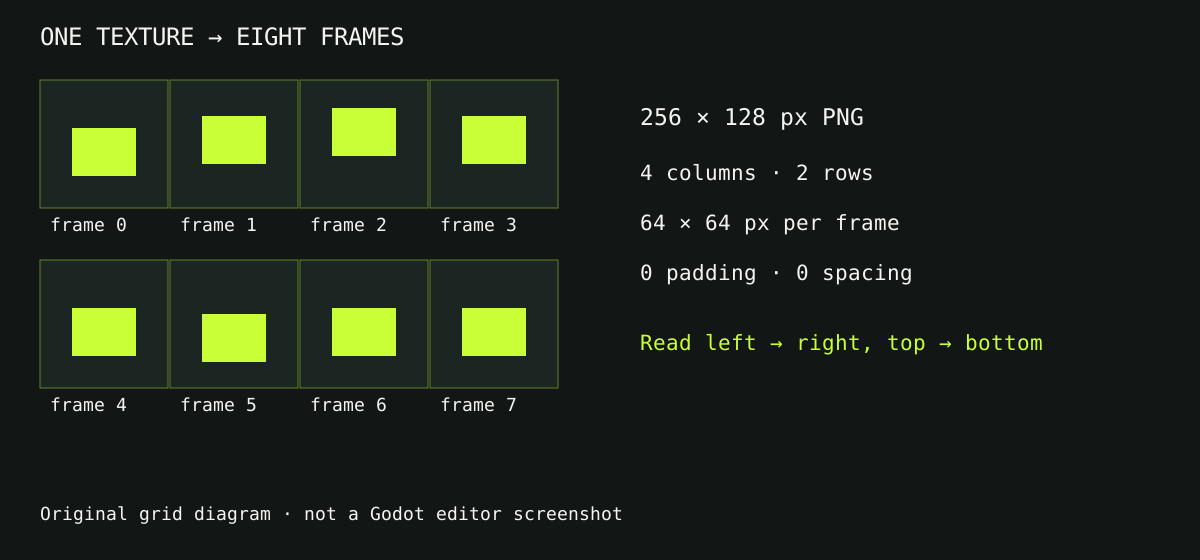
Godot sprite sheet example diagram showing eight numbered cells in a four-column two-row grid
Grid diagram for the downloadable example: 256 × 128 PNG, eight 64 × 64 cells. No padding or spacing. Original CC0 sample; not an engine screenshot.
Download the example PNG

Check frame order in your browser, then configure and verify playback in Godot.

Inspect a sheet in Animator
PRACTICAL NOTES

Before You Start: A Godot 4 Workflow

This Godot sprite sheet guide focuses on a regular grid and AnimatedSprite2D. It is based on the official stable Godot 4 documentation, rather than an editor session recorded for this article. Labels can vary between releases. Use the official references below when comparing your installed version. Godot 3 uses different node names, so do not follow this page as a version 3 tutorial.

The example is an original geometric bouncing character, supplied as a transparent PNG. It is deliberately simple: you can inspect every boundary without distinguishing detailed artwork from an import problem. You may use, modify and redistribute this example in personal or commercial projects without attribution (CC0). No third-party game artwork is included.
Understand the Example Grid

Download the PNG above and keep it unchanged for the first attempt. Its canvas is 256 pixels wide and 128 pixels high. There are four columns and two rows, giving eight 64 by 64 pixel cells. The file contains no outer padding and no gutters. Transparent room inside a cell belongs to that frame, rather than being extra spacing between cells.

Read the first row from left to right, then the second row. The diagram numbers those cells from zero through seven. Do not use the diagram itself as the input texture: it contains labels and borders. The download is the clean, transparent image. At eight frames per second with equal frame durations, one pass through these eight frames takes one second. This is an example calculation, not a recommended speed for every character.

Import the PNG into Your Project

Save the downloaded image inside your Godot project, for example in an art folder. Keep a copy of the source file outside the project before making changes. Start with a small test scene so unrelated movement scripts cannot hide mistakes in the frame sequence.

A useful preparation check is to inspect the PNG in the browser animator first. Use four columns, two rows, no padding and no spacing. This checks whether the source and your grid assumptions agree; browser playback does not prove that the Godot scene is configured correctly.

Create SpriteFrames and Select the Cells

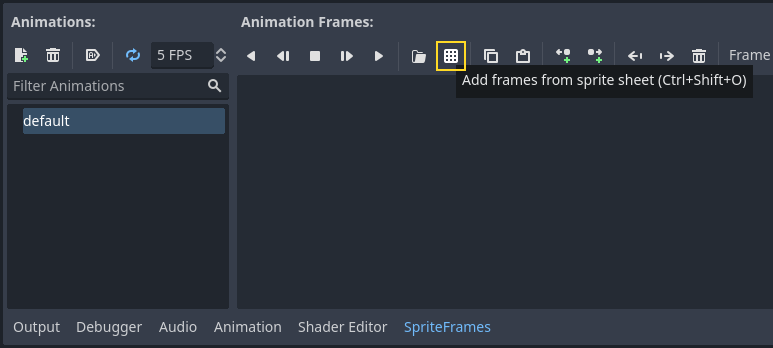
Add an AnimatedSprite2D node to your scene. Create a new SpriteFrames resource in its Sprite Frames property and open that resource. In the SpriteFrames panel, use Add frames from a Sprite Sheet and select the downloaded PNG.

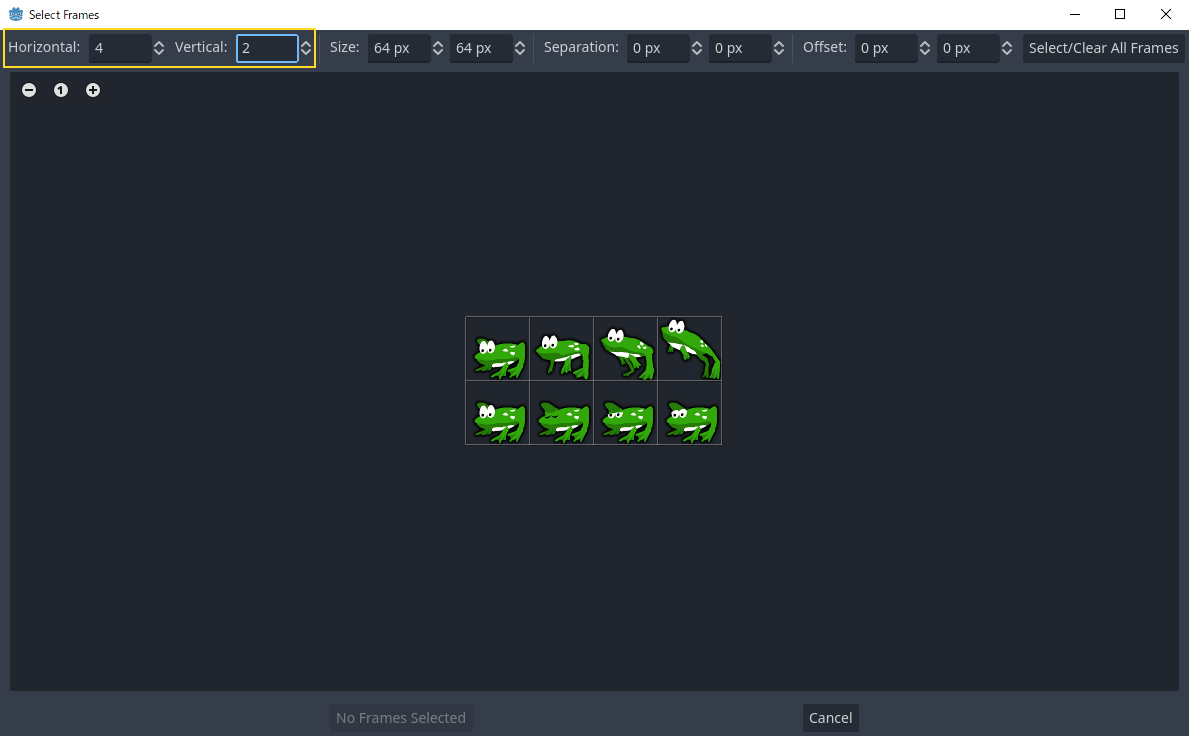
Set the horizontal image count to four and the vertical count to two. Select the eight cells in reading order and add them to an animation named bounce. Inspect the resulting frame list before playback; rename the animation consistently if your scene already uses another name.

Godot SpriteFrames toolbar with the Add frames from a Sprite Sheet button highlighted
The official editor screenshot locates the sprite-sheet import button. Godot Engine documentation contributors · CC BY 3.0. Unmodified.
Godot Select Frames dialog dividing the official frog example into four columns and two rows
Official documentation example: a frog sheet divided into a 4×2 grid. This illustrates the same grid layout as our downloadable geometric sample; the artwork differs. Godot Engine documentation contributors; frog artwork credited to tgfcoder · CC BY 3.0. Unmodified.

Preview, Set Timing and Start Playback

Preview the animation in the SpriteFrames panel. Choose the animation speed and whether it loops. For this sample, eight FPS is a convenient starting point. Check both the first pose and the wrap from the last frame to the first; a loop can look wrong even when all the middle frames are in order.

Editor preview and scene playback are separate checks. For an animation that starts when the scene loads, configure autoplay for the bounce animation, or explicitly call play("bounce") on the AnimatedSprite2D node from your own script. Keep the resource animation name and the script name identical.

Troubleshoot the Grid Before Changing the Artwork

If the character appears cut in half, compare the full image dimensions with the number of columns and rows. A grid cell in this example must remain 64 by 64. Selecting four by four would produce the wrong height. If your own sheet contains gutters or outer margins, do not assume that this zero-spacing example applies unchanged: repack it into a regular grid or prepare appropriate regions.

If the character jumps sideways, inspect the artwork inside each cell. The example changes its vertical position intentionally to make a bounce. A walking character normally needs a stable foot baseline instead. Re-centering every frame by its visible silhouette can erase intended motion or introduce jitter; decide what should stay fixed before aligning it.

If neighboring colors bleed into the sprite, inspect both frame boundaries and texture filtering. Pixel art usually needs a different filtering choice from painted artwork. Check the current Godot texture filtering documentation rather than copying import settings from a different major version. If nothing moves, first check the selected animation, playback state and speed before re-exporting the PNG.

Use the Same Checks on Your Own Sprite Sheet

Replace the example only after you understand its grid. Write down your own image dimensions, cell dimensions, frame count, margins and expected ordering. Keep that small specification with the asset. For a tightly packed atlas containing different rectangle sizes, use its metadata or suitable texture regions; equal-grid slicing is not a substitute for atlas information.

Use the Maker to combine individual images, the Cutter to inspect or extract cells, and the Animator to review order and timing in a browser. Then finish the import in Godot and check scene playback there. These tools help prepare images; they do not export a complete Godot project or automatically configure collision shapes, movement states or gameplay logic.

Official references

Questions,
answered.

Does the PNG contain animation speed?

This sample PNG stores the grid of pixels. Configure speed and looping in the SpriteFrames resource; do not expect the PNG to carry a playable animation timeline.

Can I use this sample in a commercial game?

Yes. The original geometric example on this page is released under CC0. This permission applies to the downloadable sample, not to Godot or third-party artwork.

Has this tutorial been tested in a Godot editor?

No. The workflow is based on the official stable Godot 4 documentation. The sample dimensions have been checked, but engine import and scene playback have not been tested for this article.